

🚀 Why Multi-Agent Systems? Inspiration for No-Code AI Builders
Multi-agent systems aren’t just AI buzz—they’re game-changing for education, business, and community projects. Here’s what’s possible when you combine Chipp (no-code AI agent builder) and Make (automation platform):
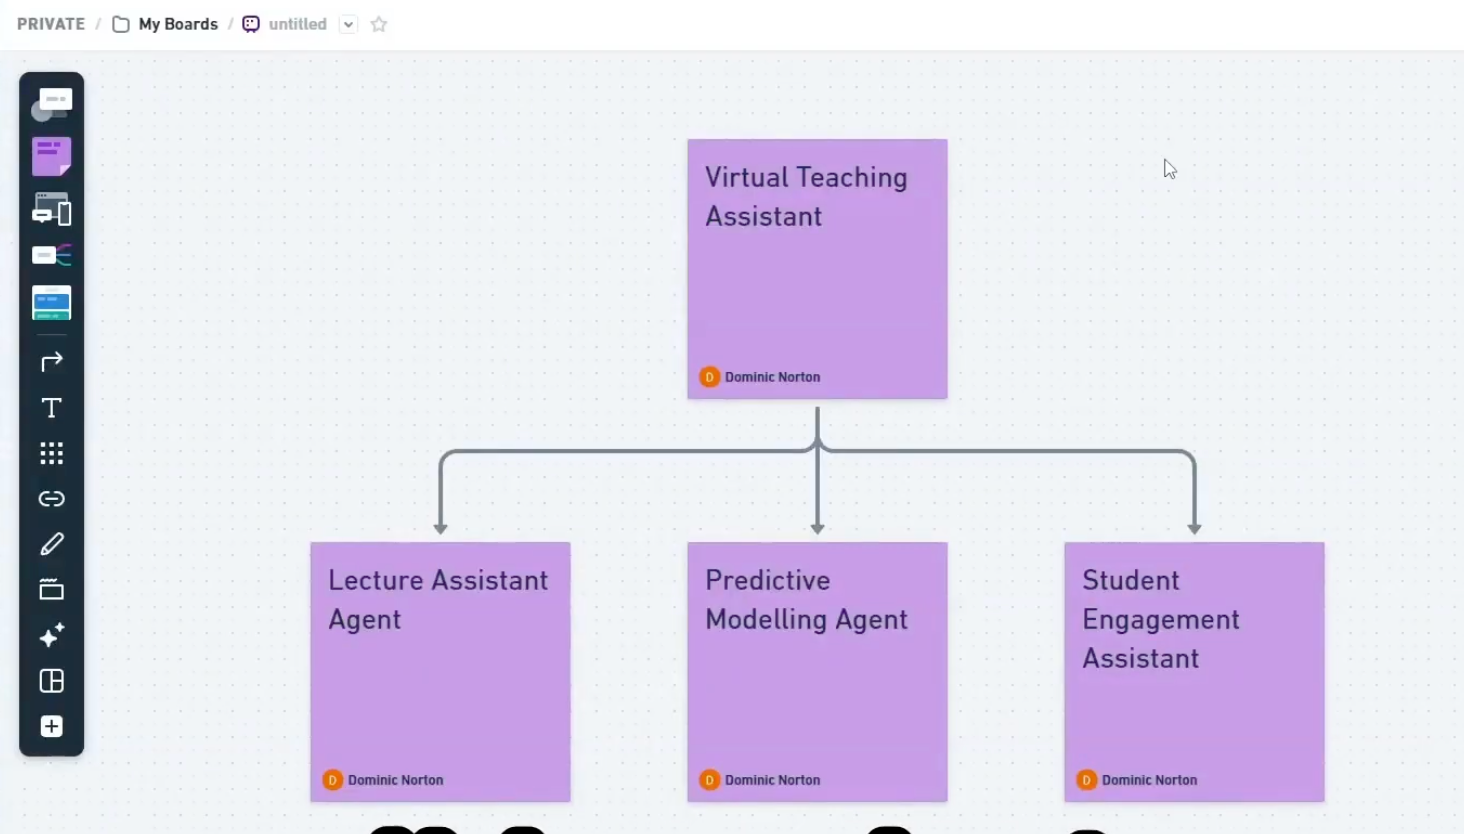
- Virtual Teaching Assistants: Coordinate personalized help for students using specialized sub-agents (for lectures, predictions, and engagement).
- Lecture Assistant Agents: Instantly tag, organize, and deliver complex educational content for teachers and learners.
- Predictive Modeling Agents: Bring data-driven insights into courses, dynamically generating analysis based on historical data.
- Student Engagement Assistants: Keep learners motivated, involved, and excited with tailored AI-driven interactions.
With these workflows, you can orchestrate a team of AIs that work together—no code required!
🛠 Step-by-Step: Build Your Multi-Agent System with Chipp & Make
Prerequisites
- Free accounts on Chipp.ai and Make.com
- An idea or problem to solve (e.g., deliver classroom lectures, analyze data, engage students)
- Basic understanding of the information your agents will interact with (documents, questions, data sources, etc.)
1. Plan and Define Your Agents (Brainstorm & Role Assignment)
Goal: Map your "team" of AI agents, assigning each a clear, single-purpose job.
Example:
- Lecture Agent: Answers factual questions and provides educational content.
- Predictive Agent: Analyzes data, makes predictions, or summarizes trends.
- Engagement Agent: Checks in with users, asks probing questions, or suggests extra resources.
How-To:
- Write down your user journey (e.g., “A student asks a question about history, the system delivers a fact, predicts future exam topics, and offers interactive follow-up.”)
- For each part, assign a single agent: “Who handles this? What’s their role?”
2. Build Each Agent Separately in Chipp
a. Create Your First Agent (e.g., the Lecture Agent)
- Go to Chipp.ai
- Click “New Agent”
- Fill in:
- Agent Name: (e.g., “LectureBot”)
- Role/Purpose: “Delivers concise and referenced answers to subject-specific questions.”
- Prompt/instructions: Be specific (“When someone asks about a historical event, give a 2–3 sentence summary, provide a citation, and an engaging follow-up question.”)
- Optionally: Add a Knowledge Base (upload lecture notes, docs, or link resources)
- Test with a question (e.g., “What started World War I?”)
b. Repeat for Other Agents
- PredictiveBot: “Analyzes grade trends and predicts student progress based on sample data.”
- EngagementBot: “Keeps students motivated by asking reflection questions and sharing motivational quotes.”
Tip: Each agent should ONLY focus on its unique function.
3. Set Up Your Multi-Agent Workflow in Make
What you’ll do: Stitch your agents into a pipeline/workflow.
a. Connect Chipp Agents with Make
- In Chipp, for each agent, click “Integrations” or “API” to create an API key/endpoint (copy these for Make)
- In Make.com, click “Create a new scenario”
- Add a trigger (e.g., “Watch for new question from user” via webhook, Google Form, or chat widget)
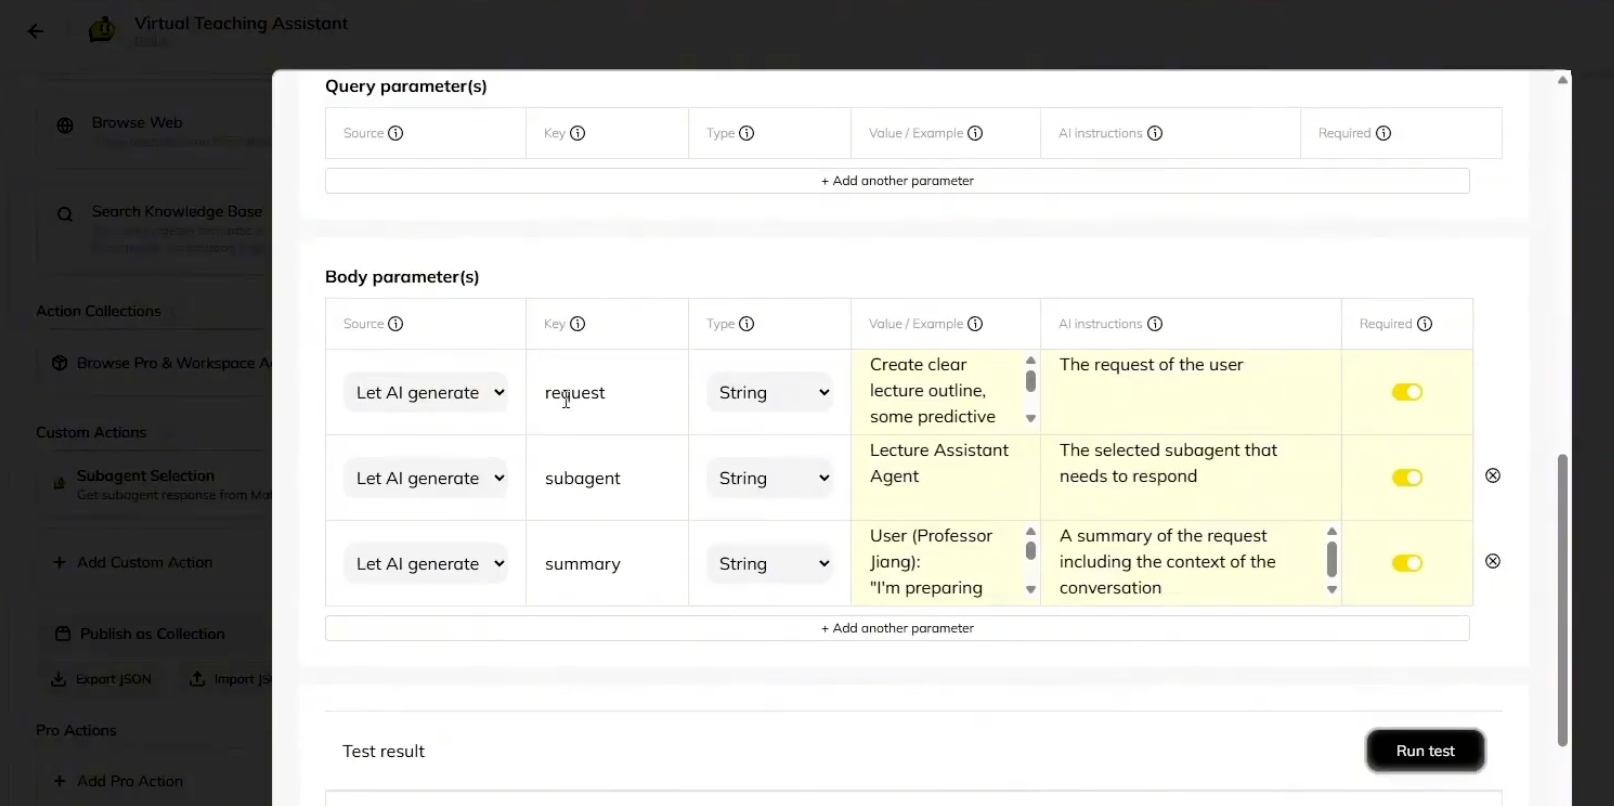
b. Add Chipp Modules to Make Scenario
- Search for “HTTP” in Make and select “Make a request” (since direct Chipp integration might be via HTTP/Webhook)
- For each agent:
- Add a module calling that agent’s endpoint
- Pass user’s question, or the output of the previous agent as “input” to the next (e.g., user’s question → LectureBot → answer feeds into PredictiveBot)
c. Configure Data Routing and Formatting
- Use Make’s “Set variable” or “Text aggregator” modules to combine, format, or separate responses
- Example:
- New question received
- Route to LectureBot (get answer)
- Send same (or modified) query + context to PredictiveBot (get prediction)
- Send both outputs (possibly as a single string) to EngagementBot (get motivational follow-up)
d. Output to End User
- Choose how your final output is delivered (e.g., via chat, email, dashboard, or a Google Doc)
- In Make, add a module to send this message back to the user (e.g., via webhook response, Gmail, Slack, etc.)
Visual Example:
[User Q] → [Lecture Agent] → [Predictive Agent] → [Engagement Agent] → [Response to User]
4. Test and Refine Your System
- In your Make scenario, run a test (“Run Once”)
- Enter a sample question
- Watch the full sequence:
- LectureBot reply?
- Predictive insight delivered?
- Engagement message added?
- Check for clarity, timing, and relevance of each piece.
- Adjust any agent's instructions (in Chipp) or the data flow (in Make) for improvements.
5. Automate and Share
- Once it works as intended, set your Make scenario to “ON” (live automation).
- Share your input link with students, colleagues, or test users.
- Monitor usage (via Chipp chat logs or Make scenario logs) and refine as needed:
- Are users getting helpful responses?
- Does each agent add value?
- Is follow-up engaging?
🔥 Advanced Tips
- Use Chipp’s “Knowledge Grounding” to keep answers referenced and accurate—especially for education!
- Add branching in Make: route specific topics to specialized agents.
- Set up analytics to see which agent contributes the most value.
💡 Key Tips & Insights
- Tag and organize all agent outputs for easy retrieval—especially with lecture or content-heavy use cases
- Use Make’s logic tools to route questions or escalate complex queries to human instructors if AI agents can’t handle them
- Keep engagement agents “human”—add prompts for encouragement, polls, or quick feedback to students
- Always test your workflow with real end users for best results
🎬 Watch the Full Video
For the complete walkthrough, visual aids, and more inspiration, check out the source video: ▶️ Multi-Agent Systems with Chipp & Make (YouTube)


