

Lesson 1: How To Share Your Chipps With Your Audience
In this lesson you'll learn when and how to use the different sharing options on Chipp.
Watch the tutorial below to learn to... 👇
- How to share your Chipp with a direct URL
- How and when to use iframe embeds
- How and when to use the widget
- How to share them using your creator profile
Lesson 2: How to Share Your AI Apps Using the Chipp HQ
In this lesson you'll learn how to share your chipp apps via your Chipp HQ.
Watch the tutorial below to learn... 👇
- What the HQ is?
- How you can share your apps with your team, your potential customers and others using the HQ.
Lesson 3: How To Manage Workspaces & Share Chipps With Your Team
In this lesson you'll learn when and how to use private and shared workspaces and how to invite team members to your workspace.
Watch the tutorial below to learn... 👇
- The difference between a private and shared workspace
- How to invite others to your team workspace
- How to use private workspaces to build in private and share when ready.
Lesson 4: How To Transfer & Duplicate Your Chipps
In this lesson you'll learn when and how to duplicate and transfer your Chipps.
Watch the tutorial below to learn... 👇
- When and how to transfer your Chipps to other workspaces
- When and how to use duplicates e.g. for:
- personal copies of Chipps that you've transferred
- maintaining copies for version history
🚨 NOTE:🚨 After duplicating your Chipps, they are no longer connected to one-another. So if and when you make changes to either the original, or the duplicate, the changes will only apply to that one Chipp. Also any Chat history that you had in your original Chipp will not transfer to the new Duplicate.
Lesson 5: How to Deploy Chipp to Slack
In this lesson you'll learn how to deploy your Chipp app on Slack.
Find Deployments under "Share" and Deploy tab.
Lesson 6: How To Customize & Brand Your Chipps
In this lesson you'll learn how to change the theme, colors and logos on your Chipp.
Watch the tutorial below to learn to... 👇
- Change the theme on your Chipp
- Upload your custom logo on your Chipp
- Modify the Colors on your Chipp
- Link the CTA button on your Chipp to direct to your preferred URL
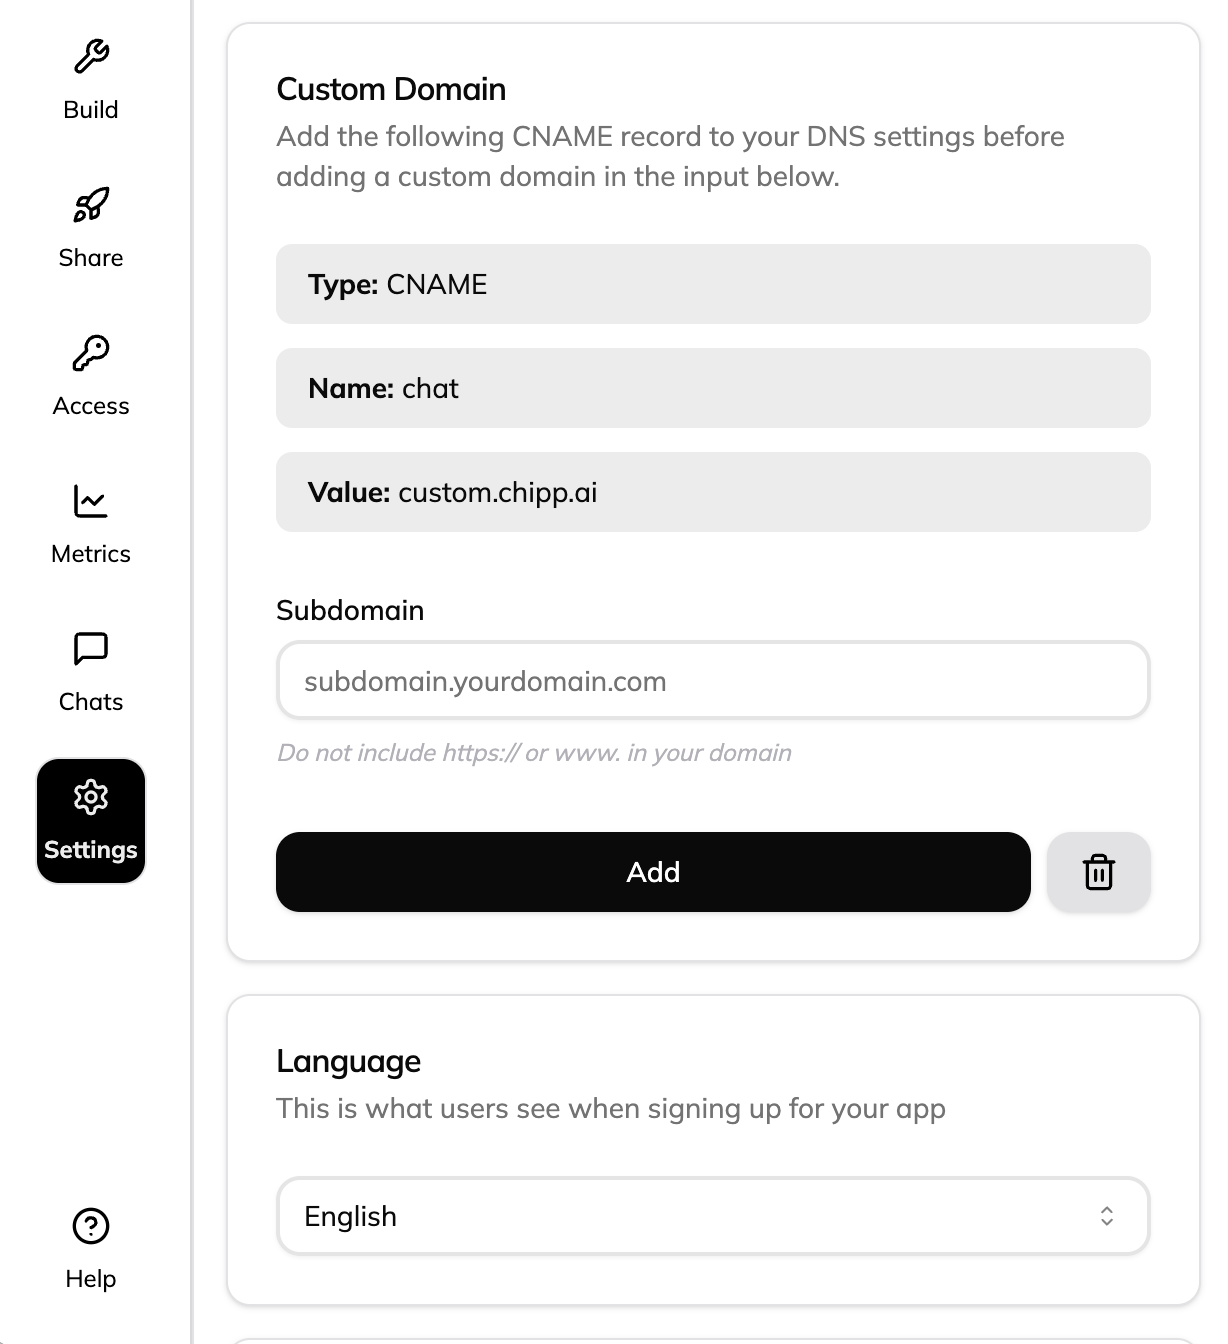
Lesson 7: How To Add A Custom Domain
In this lesson you'll learn how to add a custom domain for your Chipp. This means changing your Chipp URL from e.g. "chat-6842.chipp.ai" to "chat.mydomain.com".
Find the Custom Domain under "settings" in the new Chipp App.
Watch the tutorial below to learn... 👇
- How to create a subdomain for your Chipp
- Chipp.ai
- Your Domain Provider (e.g. godaddy, hostinger or other)
- Accessing your DNS settings on your website hosting provider's website (depending on your website hosting provider)
- Choosing between different types of records (A, CNAME etc...)
- Adding a CNAME record
- Adding "name" or ""title" (= choosing what your subdomain name for the specific chipp chat is. This can be anything you want, e.g. ai, chat, expert...)
- Adding value "custom.chipp.ai" (always the same)
- Save on your hosting provider site
- Return to Chipp.ai to input your saved custom domain (e.g. chat.scottdavidmeyer.com)
Lesson 8: How to embed iframes with user sign-up enabled
In this lesson you'll learn how and when you need to use custom URL's to enable user sign-up iframe integration.
Watch the tutorial below to learn to... 👇
- How to make a user sign-up enabled app work on an iframe.
Lesson 9: How to Embed Your Chipp Apps on Squarespace
In this lesson you'll learn how to embed your Chipp chats on Squarespace.
Lesson 10: How To Limit Access To Your Chipps
In this lesson you'll learn the different ways in which you can limit who can access your Chipp apps.
Watch the tutorial below to learn to... 👇
- User sign-up (= user needs to sign-up with email & password to access the Chipp).
👉 Great option when you have a Chipp that anyone can start using when they find it. - Redirect after sign-up (separate video tutorial coming soon!)
- Domain Whitelisting (= give access only to emails with specific domains: e.g. google.com, scottmeyer.com)
👉 Great option for Chipps that are only shared with specific company emails. - Email Gating (=give access to individual emails either by typing them in, or importing as a CSV)
👉 Great option for e.g. giving your newsletter email list access to your Chipp app.
Lesson 11: How to Share Your Chipps with the HQ
Learn how you can share and sell your Chipps through the HQ (AKA Headquarters)
Lesson 12: How to Create & Share your Branded Chipp Widget
Learn to customize your Chipp Widget to fit your branding and share it with your audience